
Diving into the world of pastries, there’s one that stands out, not just for its taste but for the sheer culinary craftsmanship it embodies – the cronut. This delightful treat, a hybrid between a croissant and a doughnut, has taken the world by storm, and for good reason. Its flaky layers, rich texture, and the perfect balance of sweetness make it a must-try for anyone who calls themselves a pastry aficionado. In this comprehensive guide, we’ll embark on a journey to unravel the secrets behind making the perfect cronut, from the basic ingredients to the intricate process of layering and frying. So, roll up your sleeves, and let’s get ready to transform your kitchen into a mini patisserie!
Introduction to Cronuts
What is a Cronut?
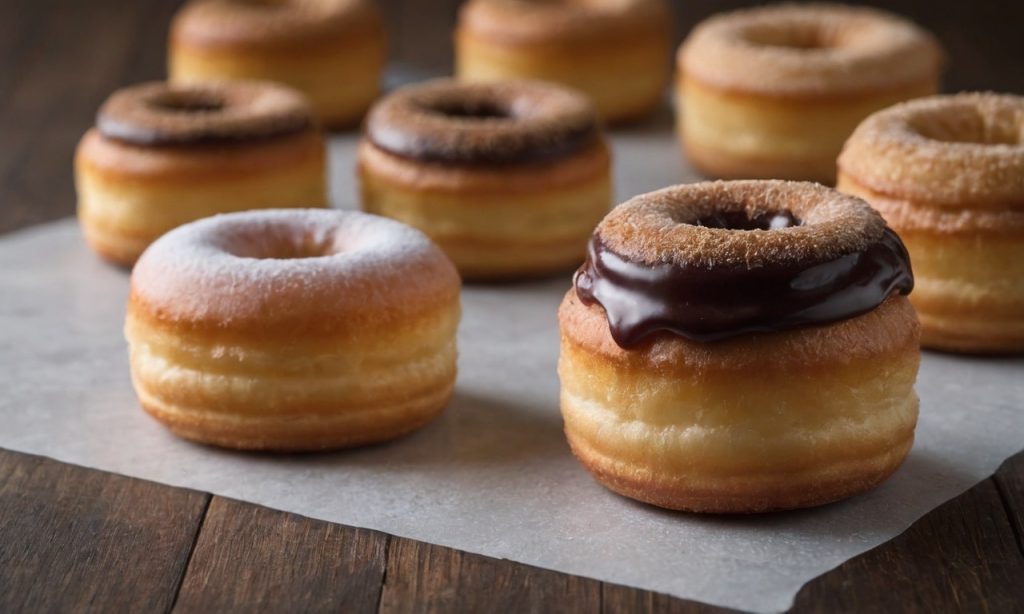
Ah, the cronut, a true marvel in the world of pastries! Imagine, if you will, the buttery, flaky layers of a croissant, combined with the sweet, satisfying bite of a doughnut. Voilà! You’ve got yourself a cronut. This pastry has not just captured the hearts of sweet tooths but also the curiosity of culinary enthusiasts eager to understand its unique composition.
The Origin of Cronuts
Now, let’s take a little trip down memory lane. The cronut was first introduced by the renowned pastry chef Dominique Ansel in New York City. It wasn’t long before this innovative pastry became a sensation, with people lining up just to get a taste. The cronut‘s fame quickly spread far and wide, making it a global phenomenon.
Why Cronuts Have Become So Popular
You might wonder, “What’s all the fuss about?” Well, the cronut isn’t just any pastry. It’s a symbol of culinary innovation, blending two beloved treats into one. Its popularity lies not just in its taste but also in the experience it offers – the anticipation, the first bite, and the myriad of flavors that follow. It’s an adventure, a delightful surprise in every layer.
So, there you have it, a brief introduction to the world of cronuts. Stay tuned as we delve deeper into the ingredients and tools you’ll need to embark on this pastry-making journey. Trust me, it’s going to be a scrumptious ride!
Crafting Cronuts: Ingredients and Tools
Ingredients for the Cronut Dough
First things first, let’s talk about the building blocks of our cronut – the ingredients. You’ll need some bread flour for that sturdy yet tender structure, a pinch of kosher salt to balance the sweetness, and a sprinkle of granulated sugar to add just the right amount of sweetness. Don’t forget the instant yeast, which will give our cronut its lovely rise, and cold water to bring it all together. An egg white will add lightness to the dough, and unsalted butter will introduce those mouth-watering, flaky layers. A dash of heavy cream will enrich the dough, making it utterly delectable.
Ingredients for the Fillings and Glazes
Now, onto the fun part – the fillings and glazes! Here’s where you can let your imagination run wild. From velvety pastry creams to rich chocolate ganache, the possibilities are endless. And for the glaze? Think of it as the cherry on top. Whether you prefer a simple vanilla glaze or something more adventurous, it’s all about adding that final touch of sweetness and shine.
Tools and Equipment
Alright, let’s gear up! To bring our cronut to life, you’ll need some basic baking tools. A sturdy rolling pin will be your best friend, helping you roll out the dough to perfection. A set of round cutters will shape our cronuts, giving them their iconic look. And let’s not forget a deep-fry thermometer to ensure our oil is just the right temperature for frying. A stand mixer with a dough hook attachment will make the dough-making process a breeze, and a piping bag with a fine tip will be crucial for those delicate fillings.
With our ingredients and tools at the ready, we’re all set to dive into the heart of cronut making. Stay tuned as we explore the art of preparing the dough, layering, and shaping our way to pastry perfection. It’s going to be a hands-on, flour-dusted adventure, and I can’t wait to get started!
The Cronut Recipe: Step-by-Step Instructions
Preparing the Dough
Alright, let’s get down to business! Preparing the dough is the first step on our cronut journey. Begin by mixing your bread flour, kosher salt, and granulated sugar in the bowl of your stand mixer. Sprinkle in the instant yeast, then add the cold water and egg white. Mix until just combined – we’re looking for a rough, shaggy dough here, folks. Then, add your chunks of unsalted butter and mix again. Don’t overdo it; we want to see bits of butter in the dough. This, my friends, is the secret to those heavenly layers.
The Importance of Dough Consistency
Now, let’s talk dough consistency. It’s crucial, absolutely crucial! Your dough should be soft yet elastic, tacky but not sticky. This delicate balance ensures that our cronut will have the perfect texture – crispy on the outside, tender and airy on the inside. If your dough is too dry, add a splash of water. Too wet? A sprinkle of flour should do the trick.
Layering and Shaping the Dough
Once your dough is ready, it’s time for some layering magic. Roll out your dough into a large rectangle, then spread a generous layer of softened butter over the top. Fold the dough like a letter, turn it, and roll it out again. Repeat this process a few times to build those flaky layers we all love.
Now, for the shaping! Use your round cutters to stamp out those classic cronut shapes. Remember, we’re aiming for perfection, but a little imperfection adds character, right? Once cut, transfer your cronuts to a baking sheet, cover them lightly, and let them take a little nap. They need to puff up and get ready for their hot oil bath.
And there you have it, the foundation of our cronut masterpiece. But we’re not done yet! Up next, we’ll dive into the thrilling world of frying and filling. So, stay tuned, and keep that rolling pin handy. We’re about to turn up the heat and bring these cronuts to life!
Mastering Cronut Cooking Techniques
Frying the Cronuts
Now, we’re getting to the heart of the matter – frying these beauties to golden perfection. Heat your oil to just the right temperature, around 350°F. This is where your deep-fry thermometer becomes invaluable. Gently lower the cronuts into the hot oil, being careful not to overcrowd the pan. They’ll puff up and turn a beautiful golden brown. Remember, patience is a virtue here; flip them carefully and fry until they’re evenly cooked. This step transforms our dough into the crispy, flaky delights we’re after.
Tips for the Perfect Fry
Here’s a tip that’s worth its weight in gold: don’t rush the frying process. The oil’s temperature is crucial; too hot, and the outside burns before the inside cooks, too cool, and the cronuts absorb too much oil, becoming greasy. Keep an eye on that thermometer, and adjust the heat as needed. And, oh! Make sure to drain the cronuts on a wire rack over paper towels to get rid of any excess oil. This ensures they stay crisp and delicious.
Filling and Glazing
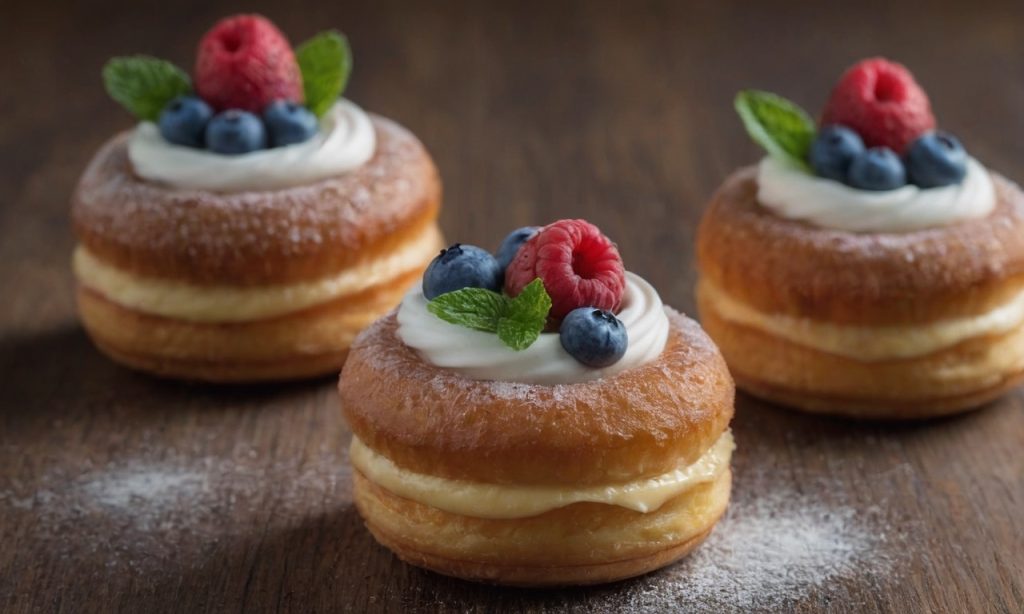
Once cooled, it’s time to fill those nooks and crannies with your chosen pastry cream or ganache. A piping bag is your best friend here, allowing you to gently fill each cronut without squishing them. Be generous but gentle; it’s all about finding that sweet spot.
For the glaze, whisk together your ingredients until smooth and glossy. Dip the top of each cronut into the glaze, giving it a little twist to coat evenly. Let the excess drip off for that perfect, shiny finish. And there you have it, cronuts that are not only a feast for the taste buds but a feast for the eyes too.
With our cronuts fried, filled, and glazed, we’re almost at the end of our pastry journey. But before we wrap up, let’s talk about how to serve and store these treats to keep them at their best. After all, perfection like this deserves to be savored to the last crumb!
Serving and Storage
Serving Suggestions
Now, let’s chat about presenting these delectable cronuts in all their glory. Imagine placing them on a beautiful platter, the glaze glistening under the light, inviting everyone to take a bite. Pairing them with a cup of freshly brewed coffee or a glass of cold milk can elevate the experience, creating a perfect balance between the richness of the cronut and the beverage. For a brunch spread, consider adding some fresh fruit on the side to cut through the sweetness. It’s all about creating a symphony of flavors that dance harmoniously on your palate.
Storage Tips
As much as we’d love for cronuts to last forever, their beauty lies in their freshness. If you find yourself with leftovers, store them in an airtight container at room temperature for a day. But remember, the clock is ticking; these pastries are best enjoyed within hours of frying. For a slightly longer shelf life, you might consider refrigerating them, but be warned, the texture might change slightly. Freezing is not recommended, as it can alter the delicate layers and moisture content, robbing the cronut of its signature texture.
With our cronuts served and stored with care, we’ve nearly reached the end of our pastry-making adventure. But before we part ways, let’s tackle some common questions and share a few advanced tips to ensure your cronut journey is as smooth and enjoyable as possible. After all, knowledge is the key to perfect pastries!
FAQs
Can I make cronuts in advance?
Ah, the age-old question! While cronuts are best enjoyed fresh, you can prep the dough in advance. Feel free to make the dough and even shape your cronuts a day ahead. Keep them covered in the fridge, then bring them to room temperature before frying. This little trick can save you some precious time, especially if you’re planning to dazzle guests at brunch!
What are common mistakes to avoid?
Beware, dear baker, of the pitfalls that await! Overworking the dough is a cardinal sin; it can lead to tough cronuts that lack those heavenly layers. Another misstep is frying at the wrong temperature. Too hot, and you’ll end up with a burnt exterior and doughy middle. Too cool, and your cronuts might soak up oil like a sponge. Keep a vigilant eye on that oil temp!
Can I use store-bought dough?
In a pinch, yes, you can turn to store-bought dough, but with a caveat. The texture and flavor might not quite match up to the homemade version. If you’re short on time or just dipping your toes into the cronut waters, it’s a viable option. Just remember, the journey from scratch offers not only a tastier reward but the satisfaction of mastering a culinary challenge.
Advanced Tips and Tricks
Mastering Lamination
Lamination, the process of folding butter into the dough, is what gives cronuts their signature layers. The key here is to keep everything cold; if the butter melts, you’ll lose those distinct layers. Consider chilling your dough between folds, and always work quickly. This attention to temperature control is what separates the novices from the pros in the pastry world.
Creative Filling and Glazing Ideas
Once you’ve got the basics down, why not experiment with your fillings and glazes? Infuse your pastry cream with unique flavors like lavender or matcha for an unexpected twist. For glazes, think beyond vanilla and chocolate. Citrus zests, berry purees, or even coffee can add a whole new dimension to your cronuts. The beauty of baking lies in creativity, so don’t be afraid to let your culinary imagination run wild!
And there you have it, a comprehensive guide to making, serving, and savoring cronuts. From the initial stir of the dough to the final, satisfying bite, it’s a journey filled with challenges, learning, and, most importantly, delicious rewards. So, preheat those ovens, and let’s get baking!
Conclusion
As we wrap up our comprehensive journey through the art of making cronuts, it’s clear that this isn’t just about following a recipe. It’s about embracing the process, understanding the nuances, and putting a piece of yourself into every batch. Whether you’re a seasoned baker or a curious newbie, the world of cronuts offers a canvas for creativity, a test of skill, and ultimately, a deliciously rewarding experience.
Remember, every cronut is a little masterpiece, a symphony of layers and flavors that tells a story. Your story might be one of triumph, with each flaky layer representing a hurdle overcome. Or perhaps it’s a tale of exploration, discovering new tastes and textures. Whatever your story, the cronut is a testament to the joy of baking and the magic that happens when butter, flour, and passion come together.
So, as you embark on your cronut-making adventures, cherish the mishaps as much as the successes. Each batch, perfect or not, is a step on your baking journey, a chance to learn, grow, and, of course, indulge in some truly exquisite pastries. And who knows? With a bit of practice and a lot of love, you might just create a cronut that would make even the most seasoned pastry chefs tip their hats to you.
In the end, it’s not just about the cronuts. It’s about the memories you create, the smiles you share, and the simple pleasure of biting into something made with your own two hands. So, here’s to the bakers, the dreamers, the midnight snackers, and everyone in between. May your cronuts be flaky, your glazes be glossy, and your kitchen be filled with laughter and the sweet aroma of success.
Happy baking, and may your culinary journey be as delightful and fulfilling as the perfect cronut.